

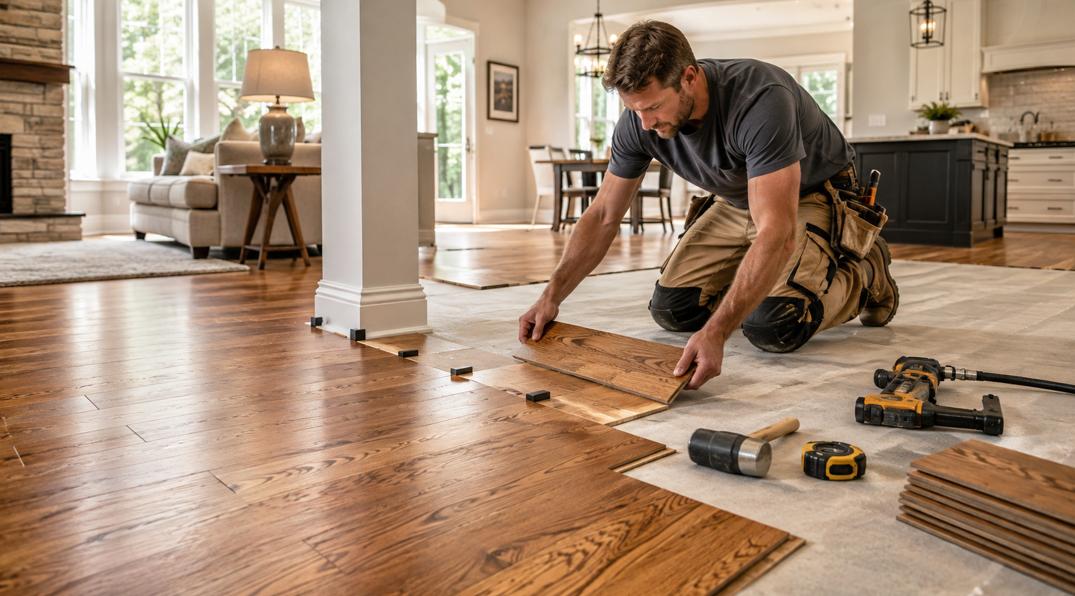
What Happens When You Decide to Install Hardwood Flooring?
Hardwood flooring can completely change how a home feels. It adds natural warmth, creates visual continuity between rooms, and gives homeowners a surface that can remain beautiful for many years when it is properly selected, installed, and maintained.
For Pelham, AL homeowners, however, choosing the wood species and color is only one part of the project. Understanding what happens before, during, and after installation can make the entire experience easier and help set realistic expectations from the beginning.
A professional hardwood installation involves much more than placing boards on the floor. The existing flooring may need to be removed, the subfloor needs to be inspected, moisture conditions have to be considered, and the hardwood may require time to adjust to the indoor environment before installation begins.
At Prattville Carpet, homeowners can get guidance through the flooring selection and installation process from a family-owned flooring team with decades of industry experience. Knowing what the process involves before installation day helps you prepare your home and understand why each stage matters.
Here is what Pelham homeowners can expect when planning a professional hardwood flooring installation.
Step 1: Choosing the Right Hardwood for Your Home
The installation process really begins before any tools come out. Selecting the right hardwood product for your rooms, lifestyle, and home conditions is one of the most important decisions in the project.
Solid Hardwood vs. Engineered Hardwood
One of the first choices is between solid and engineered hardwood.
Solid hardwood is made from a single piece of wood. It is valued for its authentic construction and its ability to be sanded and refinished multiple times, depending on the thickness of the boards.
Engineered hardwood is constructed with a real hardwood surface over multiple supporting layers. This layered construction can provide greater dimensional stability when indoor humidity changes.
Both options provide genuine wood beauty, but they may be recommended for different rooms, subfloors, and installation conditions.
A knowledgeable flooring consultant can help you compare the advantages of each rather than choosing based only on appearance.
Think About How the Room Is Used
A formal dining room has different flooring demands from a busy hallway or family room.
Households with children, pets, or frequent foot traffic may want to pay particular attention to wood hardness, finish, texture, and color. Some finishes and grain patterns can make everyday wear less noticeable.
Homeowners also need to consider how the new floor will connect visually and physically with flooring in nearby spaces. Board height, transitions, plank width, and overall design all influence the finished result.
The goal is to find a hardwood floor that looks beautiful while fitting the way your household actually lives.
Step 2: Measuring the Space and Planning the Project
Once the flooring direction is clear, accurate measurements help determine how much material the project requires.
Professional measuring is about more than calculating basic square footage.
Installers or flooring professionals may consider:
Room dimensions
Closets and adjoining areas
Doorways and transitions
Hallways
Angled walls or unusual layouts
Waste allowance for cuts
Board layout
Existing flooring conditions
Ordering exactly the room's measured square footage usually is not enough because some material is needed for cuts, board selection, and installation waste.
The amount of extra flooring required can depend on the room layout and the specific product.
Planning also includes considering where the installation will begin and how boards will flow through connected areas. In open-concept homes, plank direction can make a noticeable visual difference.
A carefully planned layout creates a more polished appearance and reduces surprises once installation begins.
Step 3: Preparing for Hardwood Acclimation
Hardwood is a natural material, so it responds to changes in its environment.
Wood can expand when it absorbs moisture and contract when it loses moisture. Because of this, some hardwood products may need to spend time inside the home before installation.
This process is commonly known as acclimation.
Why Acclimation Matters
The purpose of acclimation is to allow the flooring to reach suitable moisture conditions for the environment where it will be installed.
Installing certain hardwood products before they are ready can contribute to movement after installation. Depending on the circumstances, that movement may appear as gaps, cupping, or other changes in the boards.
Acclimation requirements vary by manufacturer and product. Some flooring may require a specific acclimation process, while other products may have different installation instructions.
The manufacturer's recommendations take priority.
Keep the Home at Normal Living Conditions
During this stage, homeowners are generally better served by maintaining normal indoor living conditions rather than dramatically adjusting heating or cooling immediately before installation.
A professional installer can evaluate the site conditions and follow the requirements for the flooring being used.
Pelham's warm, humid climate makes moisture awareness particularly relevant, but the correct approach depends on the product, subfloor, indoor environment, and manufacturer guidance.
Step 4: Removing Existing Flooring
Before the new hardwood can go down, the existing floor may need to come out.
The amount of preparation required depends heavily on what is already installed.
Carpet, laminate, vinyl, tile, and existing hardwood can all involve different removal methods. Some flooring systems may be suitable for particular installation methods without complete removal, but that decision needs to be based on the new product requirements and existing floor conditions.
What Homeowners Can Do Before Installation Day
Preparing the room ahead of time can help the project move smoothly.
Homeowners may want to:
Remove small personal items
Clear decorations from the work area
Move fragile items to another room
Empty closets when flooring will extend inside them
Discuss furniture moving arrangements in advance
Plan where family members and pets will stay during active installation
Do not assume that every installation includes furniture moving or disposal services in exactly the same way. Confirm those details when scheduling the project.
Prattville Carpet offers services including carpet disposal, making it helpful to discuss removal needs during the planning stage rather than waiting until installation day.
Step 5: Inspecting and Preparing the Subfloor
One of the most important parts of hardwood installation is also one of the least visible after the project is finished: the subfloor.
A beautiful hardwood floor depends on the surface underneath it.
What Installers Look For
The subfloor needs to meet the requirements for the hardwood product and installation method.
Installers may evaluate factors such as:
Flatness
Cleanliness
Structural condition
Moisture levels
Loose areas
Squeaks
Damage
Suitable subfloor material
If problems are found, preparation may be necessary before the hardwood is installed.
For example, low or high areas can affect how boards sit. Loose subfloor sections may create unwanted movement or noise. Moisture conditions may also need attention before proceeding.
Skipping proper subfloor preparation can compromise an otherwise high-quality installation.
When browsing hardwood flooring, it is useful to remember that the product is only one component of the finished floor. Professional preparation and installation play a major role in how the flooring performs.
Step 6: Determining the Installation Method
Not every hardwood floor is installed in the same way.
The appropriate method depends on the hardwood product, subfloor, room conditions, and manufacturer requirements.
Nail-Down or Staple-Down Installation
Some hardwood floors are mechanically fastened to an appropriate wood subfloor.
This is a traditional installation approach commonly associated with many hardwood products.
The boards are positioned carefully and fastened according to the product specifications. Proper spacing and board placement help create a consistent finished surface.
Glue-Down Installation
Some engineered hardwood products can be installed using an approved flooring adhesive.
This approach may be appropriate for certain subfloors and products.
Adhesive selection, preparation, spread rate, working time, and cleanup all matter, so following manufacturer instructions is important.
Floating Installation
Certain engineered hardwood products can use a floating installation system.
In a floating floor, the boards connect to one another rather than being individually fastened to the subfloor.
An appropriate underlayment may be used depending on the flooring system.
The correct method is not simply a matter of preference. It needs to match the flooring product and conditions in the home.
Step 7: Installing the Hardwood Boards
Once preparation is complete, the transformation becomes much more visible.
Installers begin laying the hardwood according to the planned direction and layout.
Board Selection Helps Create a Natural Look
Real wood naturally varies in grain, color, and character.
Professional installers may work from multiple cartons during installation to distribute that variation throughout the room rather than creating noticeably different sections.
This is one of the qualities that makes hardwood distinctive. The floor is not intended to look like every plank was printed identically.
Expansion Space Is Important
Because wood naturally responds to environmental changes, hardwood installations generally require appropriate expansion space around the perimeter and certain fixed objects.
That space is typically concealed later by baseboards, trim, or molding.
The exact requirements depend on the product and installation instructions.
Cuts Require Careful Planning
Boards near walls, cabinets, doorways, vents, and transitions need to be measured and cut accurately.
These finishing details have a major influence on how professional the completed floor looks.
Installation teams also need to plan board joints carefully so the floor has a balanced, natural appearance rather than obvious repeating patterns.
Step 8: Expect Some Activity During Installation
Flooring installation temporarily turns part of your home into an active work area.
There will naturally be movement, tools, material handling, and cutting while the project is underway.
Planning ahead makes this much easier for families.
Create an Alternative Route Through the Home
If the installation affects a central hallway, main living area, or commonly used entrance, think about how your household will move around the work zone.
Children and pets are generally better kept away from active installation areas.
This provides installers with clear working space and protects the newly installed flooring from traffic before the project reaches the appropriate stage.
Expect Some Noise
Removing flooring, preparing subfloors, cutting boards, and fastening materials can create noise.
Families working from home may want to plan meetings or quiet activities around the installation schedule where possible.
Keep the Work Area Accessible
Installers need access to the rooms being completed as well as enough space to handle materials and equipment.
Clearing unnecessary belongings beforehand can make the installation area easier to work in and help the project stay organized.
Step 9: Transitions, Trim, and Finishing Details
Once the main floor is installed, attention turns to the areas where the hardwood meets walls, doorways, stairs, or other flooring.
These details help give the project a finished appearance.
Flooring Transitions
A transition may be needed where hardwood meets tile, carpet, laminate, or another surface.
The type of transition depends on factors such as floor height, material type, and doorway configuration.
A well-planned transition creates a cleaner visual connection between spaces and reduces awkward height differences.
Baseboards and Molding
Expansion areas around the perimeter are generally covered by baseboards, shoe molding, quarter-round, or another appropriate trim detail.
The exact approach depends on the home's existing trim and the project plan.
These finishing elements may seem small, but they can significantly influence the overall appearance of a newly installed hardwood floor.
Step 10: Caring for Your New Hardwood Floor
Once installation is finished, good everyday care helps protect the floor's appearance.
Fortunately, hardwood care does not need to be overly technical.
Keep Dirt and Grit Under Control
Small particles of sand and dirt can become abrasive when walked across repeatedly.
Regular sweeping or vacuuming with an appropriate hard-floor setting helps keep these particles from accumulating.
Entry mats can also reduce how much outdoor debris reaches the hardwood.
Clean Spills Promptly
Wood and standing moisture are not a good combination.
Clean spills as soon as reasonably possible using a method suitable for the floor's finish.
Avoid flooding the surface with cleaning water.
Protect Furniture Contact Points
Felt pads beneath chair and furniture legs can help reduce scratching.
When moving heavy furniture, lift it when practical rather than dragging it directly across the floor.
Area rugs can also add protection in particularly busy zones, although rug pads need to be compatible with the flooring finish.
Follow Product-Specific Care Instructions
Different hardwood finishes can have different cleaning recommendations.
Using manufacturer-approved products gives homeowners a better foundation for protecting both the flooring and applicable warranty coverage.
How Long Does Hardwood Installation Take?
There is no single installation timeline that applies to every Pelham home.
The overall schedule can depend on:
Project size
Number of rooms
Existing flooring removal
Subfloor repairs or preparation
Hardwood type
Installation method
Acclimation requirements
Room layout
Transitions and trim work
A straightforward single-room installation can naturally require less work than replacing flooring across an entire home.
Preparation can also affect the schedule. Discovering subfloor concerns after the existing flooring is removed may add work, but addressing those concerns properly helps support the finished installation.
The best approach is to discuss the expected project sequence before work begins rather than relying on a general timeline that may not reflect your home.
What to Check After Installation
Once the floor is completed, take time to look over the finished space.
Consider the overall appearance as well as the smaller details.
Look at:
Board alignment
Transitions between flooring materials
Trim and molding
Door clearance
Vent openings
Edges around fixed objects
General surface condition
Natural variation between hardwood boards is normal and part of the material's appeal. Color and grain differences do not necessarily indicate an installation issue.
If you have questions about care, cleaning products, furniture placement, or when normal room use can resume, ask before the project wraps up.
Knowing how to care for the floor from day one can help you protect the investment.
Is Professional Hardwood Installation Worth It?
Hardwood flooring is a major feature of a room, and installation quality affects both its appearance and performance.
Professional installers bring experience with subfloor preparation, layout, moisture considerations, fastening or adhesive methods, expansion requirements, transitions, and finishing details.
They can also adapt when a home presents unexpected conditions once the existing flooring is removed.
Manufacturers commonly provide specific installation requirements for their flooring products. Following those instructions is important for achieving the intended performance and maintaining applicable warranties.
For homeowners investing in genuine hardwood, professional installation provides a more coordinated path from product selection to the completed room.
Get Ready for a Beautiful New Hardwood Floor
Installing hardwood flooring in a Pelham, AL home is a process, but every stage has a purpose.
The project begins with choosing the right product and accurately measuring the space. From there, attention shifts to acclimation requirements, removing existing flooring, checking the subfloor, selecting the correct installation method, laying the boards, and completing transitions and trim.
Preparation is what helps turn a beautiful flooring product into a beautiful finished floor.
For families, the biggest advantage of knowing the process ahead of time is simple: you can prepare your home, understand what the installation team is doing, and feel more confident about what comes next.
Hardwood can bring natural warmth, lasting style, and real character into a home. When the flooring is selected carefully and installed professionally, it can become part of the space for many years.
If you are considering hardwood for your Pelham home, reach out to us to discuss flooring options, professional installation, and an in-home flooring estimate.


