

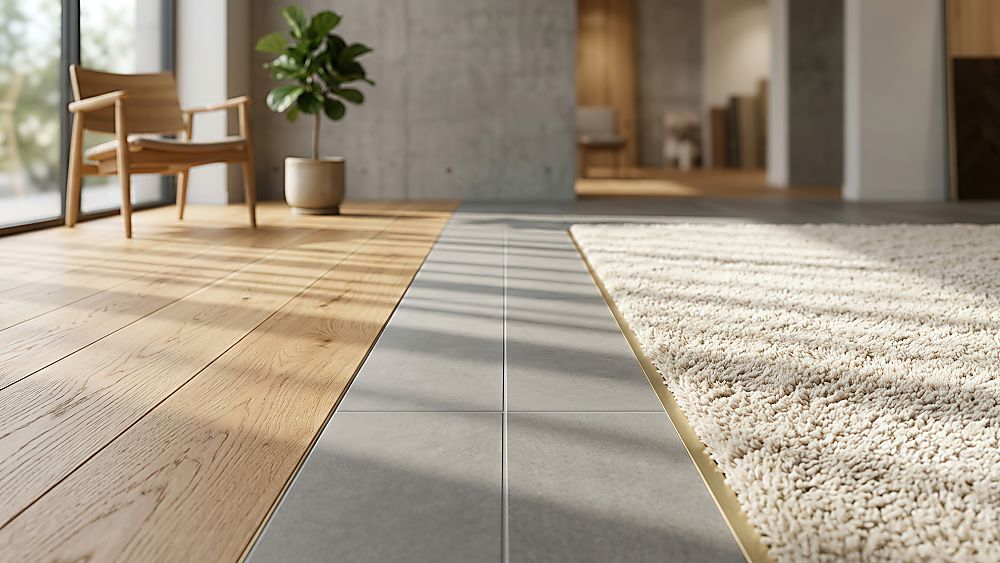
When you update your living areas with new laminate flooring while keeping your existing ceramic or porcelain tile in the kitchen, bathrooms, or foyer, the point where those two surfaces meet is critical. Nothing disrupts the flow of your home faster than an awkward, uneven threshold that stubs your toes, catches your vacuum cleaner, or cracks under heavy foot traffic.
Joining modern laminate to existing tile requires balancing two completely different flooring dynamics. Tile is a rigid, stationary surface set in thick mortar, whereas laminate is a floating floor that naturally shifts, expands, and contracts with seasonal temperature and humidity changes. To create a safe, smooth, and visually appealing doorway transition, you need the right transition profile, an accurate subfloor assessment, and an adequate expansion gap.
At Prattville Carpet, we believe you should never have to compromise between beauty and long-term durability. Here is everything you need to know to join laminate to tile seamlessly without clumsy step-downs or buckling boards.
What Causes Uneven Transitions Between Laminate and Tile?
An awkward transition occurs whenever there is a height difference or structural conflict between two adjoining surfaces. When you install floating laminate next to an existing tiled floor, you will almost always encounter three underlying challenges:
1. Finished Floor Height Discrepancy: Existing ceramic or porcelain tile is typically laid over backer board and a layer of thin-set mortar. This often raises the finished tile height anywhere from three-eighths of an inch to three-quarters of an inch above the subfloor. High-performance laminate planks, such as Mohawk RevWood or Liberty Home collections, generally range from 8 millimeters to 12 millimeters thick. Even with quality acoustic underlayment, your new laminate often sits lower than your existing tile.
2. Foundation and Subfloor Imperfections: Whether your home sits on a concrete slab in Montgomery or Pike Road, or rests over a conventional crawlspace in Millbrook or Wetumpka, subfloors are rarely level across room thresholds. Any dip or crown at the doorway magnifies height discrepancies.
3. Movement Conflict: Tile is permanently bonded to the subfloor with zero flexibility. Laminate is designed to float freely over your pad. If you fasten laminate directly against your rigid tile edge, the planks will bind, pinch, and peak.
Why Expansion Gaps Are Mandatory for Floating Laminate Floors
An expansion gap is a deliberate space (typically one-quarter to three-eighths of an inch) left around the entire perimeter of a floating floor, including where it meets fixed objects, walls, cabinets, and adjacent tiled floors.
Because laminate contains high-density fiberboard (HDF) derived from natural wood fibers, it responds directly to relative humidity and ambient temperature. During our hot, humid Central Alabama summers, laminate absorbs ambient moisture from the air and expands outward. In the drier winter months when you run your heating system, the planks release moisture and contract.
If you do not leave an adequate expansion gap between your laminate and tile, the expanding planks will collide with the immovable tile edge. With nowhere left to expand, your laminate floor will lift off the subfloor, resulting in peaked seams, hollow spots, or broken locking mechanisms. A transition strip bridges this necessary gap, covering the empty perimeter while allowing your laminate to expand and contract freely underneath.
Selecting the Right Transition Molding Profile
You can eliminate tripping hazards by choosing a transition strip engineered for your specific height relationship. Never force a flat strip over uneven surfaces. Instead, match your doorway to one of three primary molding profiles:
When to Use a T-Molding (Flush-to-Flush Transitions)
A T-molding is shaped like the capital letter "T." You should use a T-molding only when your existing tile and new laminate are at the exact same height, or within a strict tolerance of one-sixteenth of an inch.
The vertical stem of the T-molding drops down into your expansion gap and locks into a metal tracking channel secured to the subfloor. The two horizontal wings extend outward, resting lightly over the top edges of both the tile and the laminate. This covers the expansion space while allowing the floating floor to glide underneath as indoor humidity fluctuates.
When to Use a Hard Surface Reducer (Offset Height Discrepancies)
In most remodeling projects, your existing tile sits higher than your new laminate. In this scenario, a hard surface reducer molding is the ideal solution.
A reducer features a sloped, beveled contour on one side and a flat overlap on the other. It locks securely into your subfloor channel, overlaps the high edge of your tile, and slopes gently down to meet the surface of your laminate. This gradual incline eliminates the sharp step-down, shielding your laminate planks from chipped edges and providing a safe, toe-friendly passage between rooms.
When to Use an End Cap or Threshold Profile
An end cap (often called a square nose or baby threshold) features a flat top with a sharp, square downward drop. You should choose an end cap when your laminate terminates against a high vertical surface, such as thick stone tile, a sliding glass door track, or an elevated marble threshold.
The top lip overlaps your laminate plank to protect your expansion gap, while the square edge butts neatly against the vertical face of the higher surface.
Step-by-Step: How to Join Laminate to Tile Without Uneven Thresholds
Achieving a clean, flush-looking doorway requires careful planning before you click your first laminate plank into place. Here is the process our in-house installation teams follow to ensure a lifetime of trouble-free performance:
Step 1: Measure Your Total Height Difference. Before purchasing materials, lay a straightedge flat across your existing tile threshold and extend it out over the room where you plan to install laminate. Measure the exact vertical distance between the bottom of your straightedge and your bare subfloor. Add the thickness of your chosen laminate plank plus the compressed thickness of your underlayment pad. Comparing these two numbers tells you whether you need a level T-molding or a sloped reducer.
Step 2: Prep and Level the Subfloor. If your subfloor drops significantly right at the doorway, you must correct the substrate before laying floors. Over concrete slabs, our teams apply a feather-finish cementitious leveling compound to create a smooth, gradual plane. If your home has a plywood subfloor over a crawlspace, we sand down high joists and patch low areas so your transition strip rests on a solid, flat foundation.
Step 3: Maintain the Perimeter Expansion Gap. When laying laminate up to your tile edge, use plastic shims or spacers to maintain a consistent gap of five-sixteenths to three-eighths of an inch. Never push laminate boards tight against your tile mortar or grout line. Keep your cut lines straight and clean using a sharp carbide-tipped blade so your transition strip covers the gap evenly from end to end.
Step 4: Fasten the Mounting Track to the Subfloor. High-quality transition moldings snap into a dedicated metal or PVC track. You must anchor this track directly to your subfloor—never into the laminate or tile. On concrete slabs, drill pilot holes with a masonry bit and secure the track using masonry anchors or concrete screws. On wood subfloors, screw the track securely into your plywood subfloor along the center line between your two floors.
Step 5: Secure the Molding Without Pinning the Floating Floor. Center your transition strip over the expansion gap and press it firmly into the mounting track until it locks securely. Ensure the underside of the molding rests snugly against the flooring surface without pinching the laminate planks downward with excessive force. Your laminate must retain the freedom to expand and contract smoothly beneath the molding wing.
Common DIY Mistakes to Avoid at Doorway Transitions
Many uneven or damaged transitions are caused by avoidable installation errors:
Nailing or Screwing Through the Laminate: Never drive a fastener straight through a transition molding and into your laminate planks. Fastening the floating floor to your subfloor prevents natural expansion, causing the surrounding planks to buckle and separate.
Gluing the Expansion Gap Shut with Silicone: Never fill the space between your tile and laminate with rigid grout or construction adhesive. Trapping the edge prevents plank movement and will crack your grout within a single season.
Omitting Subfloor Moisture Barriers: In our humid River Region climate, seasonal moisture vapor can migrate through concrete slabs. Always ensure your laminate underlayment or moisture barrier extends fully to the tile edge beneath your transition channel to protect your plank cores from swelling.
Trust Your Hometown Flooring Experts for Flawless Transitions
Proper transitions protect your investment, prevent trip hazards, and deliver the cohesive, polished look you want for your interior. At Prattville Carpet, we bring over 75 years of combined flooring experience to your project. As a father-and-son owned business led by Ronny Boles and Ray Boles, we do not believe in short-term fixes or revolving subcontractors. Our experienced in-house installation teams complete every transition with precision, backed by our guaranteed workmanship.
As a Mohawk ColorCenter Elite retailer, we offer premier collections, including water-resistant Mohawk RevWood, alongside top-performing hardwood, laminate, tile, and luxury vinyl selections designed to thrive in Central Alabama homes.
Ready to eliminate awkward transitions and elevate your home? Stop by our showroom in Prattville, book our Mobile Showroom to see samples paired directly against your existing tile under your own lighting, or give our team a call to schedule your free in-home consultation and measurement. We proudly serve you across Prattville, Montgomery, Millbrook, Wetumpka, and Pike Road, AL.


